
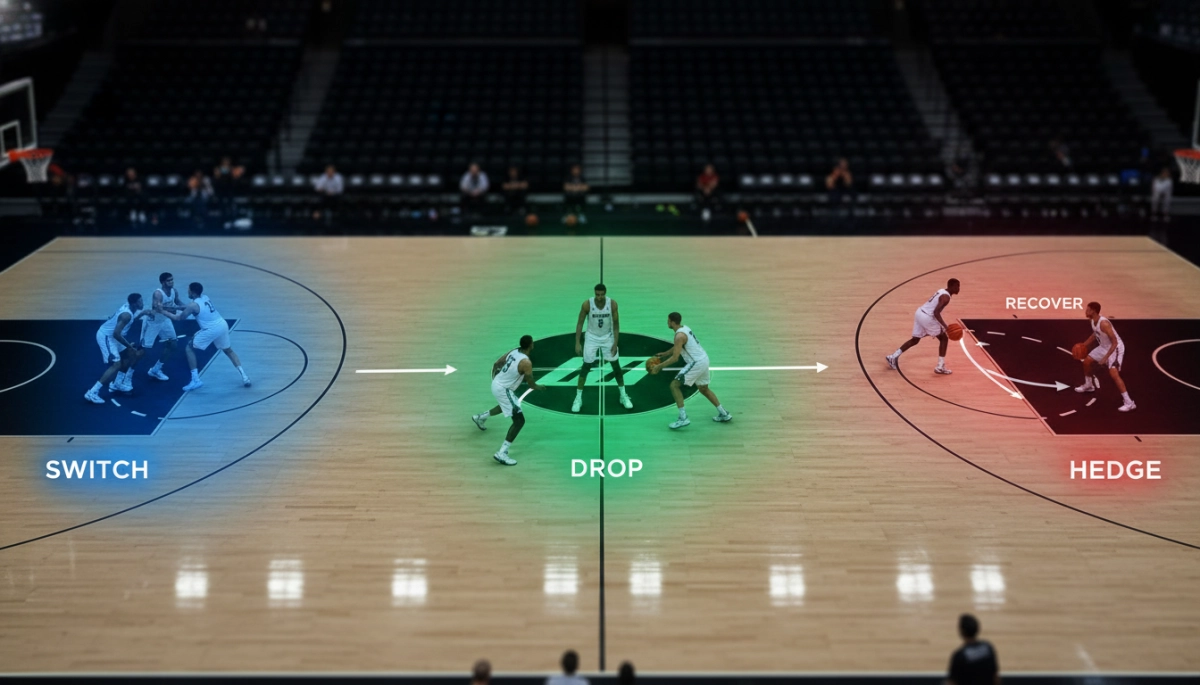
How modern NBA defenses handle the pick-and-roll and why choices matter
You face a constant stream of pick-and-roll actions in NBA offenses, and choosing between switching, dropping, or hedging determines whether you concede an easy look, a drive, or a kick-out three. Each scheme balances different risks: switches simplify assignments but create mismatches, drops protect the paint but invite perimeter shots, and hedges buy time at the cost of temporary defensive imbalance. Understanding the intent behind each action helps you pick the right tool for the personnel and opponent tendencies.
Early in a possession you should assess three quick variables: the ball‑handler’s shot threat, the screener’s spacing/roll threat, and your matchup quality. Those factors inform whether you want to trade speed for size (switch), concede a pull-up for rim protection (drop), or aggressively recover with a trap-like moment (hedge). Below are practical principles to apply immediately when the pick-and-roll develops.
Switching best practices: personnel, communication, and minimizing mismatch damage
You should switch when your lineup has multiple versatile defenders who can guard at least two positions without a severe drop in defensive effectiveness. Switching is most effective against teams that rely on quick ball movement more than concentrated isolation scoring.
- Communicate loudly and early. The screener and on-ball defender must call the switch so help-side players can adjust rotations.
- Match switch responsibility to skill sets. Put your switch-capable wing on the opponent’s primary ball-handler and keep your bigs on less mobile screeners.
- Eliminate separation with physicality. When a smaller defender is switching onto a bigger offensive player, you must use body positioning to deny easy post entries and force catch-and-shoot situations.
- Rotate proactively. If the switch creates a shooter mismatch, offense should close gaps through quick weak-side rotation and closeouts rather than relying on the new on-ball defender to stop everything alone.
Drop and hedge fundamentals: spacing control, recovery timing, and when to commit
When you choose a drop, the screener’s defender sinks to protect the rim and force the ball-handler into a longer jump shot. A successful drop depends on disciplined positioning so you neither overcommit nor allow an easy lob. Conversely, hedging is an aggressive technique: the screener’s defender steps out to momentarily impede the ball-handler, buying time for the on-ball defender to recover.
- In a drop, prioritize verticality and baseline gap control; hold ground to contain drives and challenge pull-ups.
- In a hedge, strike quickly and at the correct angle—too shallow and the ball-handler escapes, too deep and the roll man is free.
- Practice timed recoveries. The on-ball defender should communicate how long the hedge lasts and when the screener’s defender must recover to protect the rim.
- Adjust by matchup: favor drops against elite rim attackers with below-average shooting, and hedges when the ball-handler is the primary scoring threat but your big can recover quickly.
Next, you’ll look at specific footwork cues, communicator roles, and drill progressions that train players to execute switches, drops, and hedges under game pressure.
Footwork cues and positioning details that win the moment
Small, repeatable footwork beats hero plays. Teach defenders a short set of cues tied to each action so decisions become automatic under pressure.
- Switch: inside-out step to meet the screener, chest up, play through the contact. The defender on the screener should glue their inside hip to the screener’s hip and take a quick “step-through” to avoid getting sealed in the post. Emphasize choppy, short strides to stay balanced on the perimeter.
- Drop: a read-and-sink rhythm. First beat: chop back with the outside foot to create a baseline gap; second beat: establish verticality with hands ready to contest. Keep the lead foot just behind the free-throw line extended (relative to coverages) so you can close the pull-up without conceding a lob. Maintain weight on the balls of the feet to explode up or laterally.
- Hedge: quick show-and-slide. Attack the ball-handler’s shoulder with a lateral, semi-aggressive sprint (not a full sprint) and use a short kick-step back to recover. The hedge defender’s trail foot should remain anchored to steer the ball-handler toward help; hips open toward the sideline prevent the drive middle escape.
- Common small details: hands high and active on the show to discourage quick passes; eyes split between ball and roll man; use the baseline as an extra defender—force angles toward it. Train defenders to land in a stance where one quick step returns them to original coverage or a help rotation.
Communication roles, trigger words, and sight-lines
Who says what — and when — removes hesitation. Standardize the language and visual checks so every player knows their accountability in live sets.
- Assign clear primary calls: the ball defender calls “ball”, screener’s defender calls the action (“switch”, “drop”, “show”), and help-side defenders echo (“I’m over” or “behind”).
- Use two-word triggers for tempo: “Switch now”, “Drop hard”, “Hedge three”. Keep volume and cadence consistent so referees and crowd noise don’t mask the call.
- Train sight-line habits: the screener’s defender must make eye contact with the on-ball defender within the first step post-screen to confirm coverage; help-side defenders scan to pick up slip or stagger cues.
- Build a chain-of-command: when confusion happens, default to the on-ball defender’s call. That prevents double decisions and late recoveries.
Progressive drills to ingrain reads, recoveries, and rotations
Practice with purpose: start simple, add constraints, then simulate fatigue and crowd noise so execution translates to games.
- Begin with 1v1 P&R reps focusing only on one technique (switch only, drop only, hedge only). Coach the footwork and timing in real time.
- Advance to 2v2 and 3v3 with shot-clock pressure and scoring incentives for clean recoveries or forced misses. Add a rule where a bad recovery equals an easy layup for the offense—this increases accountability.
- Introduce scramble drills: multiple consecutive screens with rotating defenders to train communication and recovery sequencing under fatigue.
- Finish with situational live reps: late-clock possessions, out-of-bounds P&R, and personnel-specific scenarios (e.g., defending a lethal spot-up after a switch). Use video feedback and measurable metrics—time to recover, contest depth, and open three frequency—to track progress.
In-game adjustments and metrics to monitor
Coaches must be ready to tweak coverage choices within and between games. Use simple, actionable metrics and real-time observations to guide those tweaks rather than gut calls alone.
- Track pick-and-roll points per possession for each coverage type; small sample sizes can still reveal clear tendencies.
- Monitor open three frequency after switches and drops—if open looks spike, prioritize tighter closeouts or a different coverage mix.
- Note recovery times on hedges: measure the window between the hedge and the on-ball defender’s roof/recovery to identify breakdowns.
- Scout opponent habits: how often does a team slip screens, re-screen, or space the screener? Adjust pre-game plans accordingly.
- Use video clips of recurring failures to give players concrete visual cues—show what to replicate and what to avoid in quick, two-minute film sessions.
Build a culture that sustains the technique
Defensive schemes win when they become a shared language, practiced until reaction replaces thought. Encourage accountability, keep communication simple, and measure results with objective data—resources like NBA Stats can help quantify what you see on the floor. With repetition, clear calls, and commitment to adjustments, switching, dropping, and hedging become reliable tools rather than high-variance gambles.